Video Object for Canvas 
NOTE: For Canvas Series only. For all other controllers, see Video Object .
See also: User Interface
See also: Graphic Object Toolbox for Canvas Series
Topic Menu
Video Overview 

|
Using Video with the Horner OCS |
This object displays and provides optional Video control.
Capture of a video frame is accomplished either through the optional pop-up menu associated with the video object, or through the optional video control register, which allows ladder logic control of captures. Once captured, the video frame may be displayed, saved to Removable Media, or both.
Object Behavior
-
Functionality - This object plays the video from the specified file given in Playback field or in case of stream option video from webcam input will get displayed. In playback option the corresponding video file must be present in Removable media card.
Video Object Configuration
This object continuously samples the specified controller register (if not a constant) for a video channel change. The object plays the video from the file placed in removable media card.
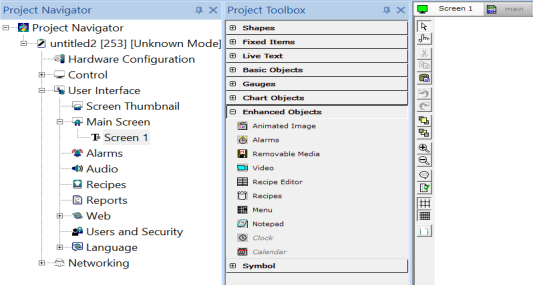
This object displays and provides optional Video control. The Video Object can be accessed through the Screens Project Toolbox > Enhanced Objects > Video. User must be on a Screen and not in the Main work area in order to see the Objects Project Toolbox items. Select the Video Object and drag to a new screen. This object can be placed anywhere on the screen and initially set to any size but is automatically re-sized to fit the nearest supported resolution after releasing the mouse button.
From Cscape 9.60 and firmware 14.04 onwards, Video Object support has been added to XL4 and XL7 devices. Also from Cscape 9.90 and firmware 15.20 onwards, Video Object support has been added to X5 devices.
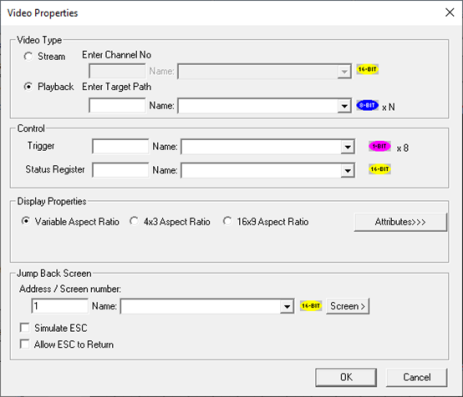
Video Object Properties
Double clicking on the Video object displays the following properties window.
Object Placement
This object can be placed anywhere on the screen and can be adjustable.
Object Specific Properties
Video Type
Video object supports streaming and playback Video types.
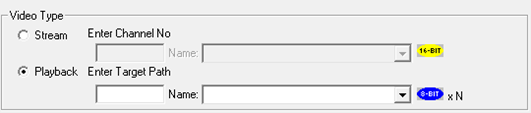
Stream - This option can be selected to view live video from web cam. Four channels are supported through USB Hub. Only one channel can be viewed at a time. Enter Channel Number directly or through registers in the “Enter Channel No” field.
Playback – This option can be selected to view videos that are stored in the Removable Media. Videos present in both A and B drives are supported. Videos of any formats like mp4, mov, mpg, wmv etc can be played. Select Playback and enter video name in “Enter Target Path” field either directly or through registers.
For example: Test1.mp4 or B:\Test2.mp4 etc.
Control

Trigger - This register is used to control different functionalities of video as explained below.
Trigger Register (1 Bit x 8)
TRIG_STARTSTOP = 0x00000001 /*Trig Reg Bit High Start & Low Stop */
Note: Trigger bit is automatically cleared when the video playback completes.
TRIG_PAUSEPLAY = 0x00000002 /*Trig Reg Bit High Pause & Low Play */
Status Register - This register gives the status of video object and the same is explained below.
Status Register (16 Bit)
STATUS_VIDEOPLAYING = 0x0001 /* Video is playing currently */
STATUS_VIDEOPAUSED = 0x0002 /* Video is paused */
STATUS_CHANNEL_INCORRECT = 0x0010 /* Channel doesn’t exist or incorrect */
STATUS_FILE_NOTPRESENT = 0x0020 /* File Not present or corrupted */
STATUS_FPS_NOTSUPPORTED = 0x0040 /* Frame Per Second NOT supported or NOT compatible */
Display Properties for Video

Resolution of video can be selected from this radio buttons as Variable Aspect Ratio, 4X3 Aspect Ratio or 16X9 Aspect Ratio.
Jump Back Screen
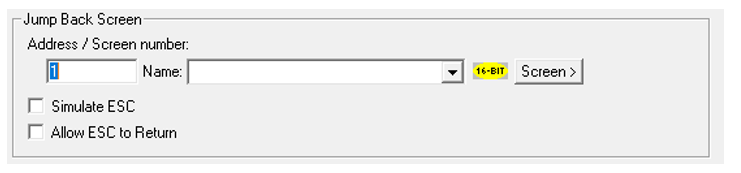
Simulate ESC - This option allows the video object to emulate ESC key. Selecting this option greys out all other options in the 'Jump to Screen Number' section. This functionality is used in tandem with the 'Allow ESC to Return' option.
Allow ESC to Return - This selection allows this screen to be saved in a screen queue when the screen jump occurs. Thereafter, if the operator presses the ESC key after the jump to the specified screen, the saved screen is ’popped’ from the queue and a jump back to that screen is performed. The screen queue will save up to the last 16 screen jumps. When no screens are queued, the ESC key does not cause a screen change.
Attributes >>>
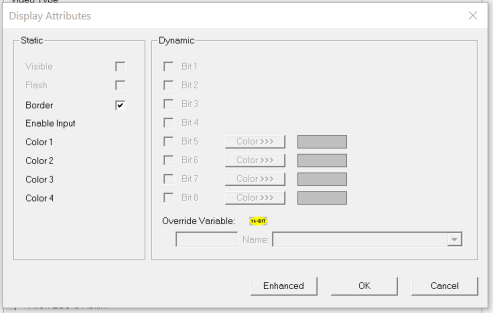
Border – Static
Enhanced - Enhanced Attribute includes Opacity, Rotation, X, Y, Width and Height of the object (static or dynamic)

This option is used for configuring the different display attribute of graphic objects mentioned below. The following options can be configured either using constant values or via register / variable.
-
Opacity – User can configure the display opacity of graphic object. Range is 0 to 100.
-
Rotation – User can configure at what degree the object should appear rotated. Range is -180 to 180.
-
X and Y axis – User can configure at what X and Y axis the object should be placed on the screen. Range depends on the model selected.
-
Width and Height – User can configure at what width and height the object should be displayed on the screen. Range depends on the model selected.
Video Object on Device
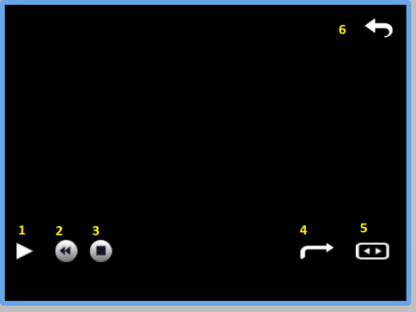
The following are the function of icons on the device for the video object.
-
Play : If video is not playing shall start video ,if playing shall stop video(while video is playing currently this icon is not visible)
-
Begin : Clicking this icon will make video to start playing from beginning.
-
Stop : Clicking this icon will stop the video from playing.
-
Loop : Video will be played in loop.
-
Full Screen : Clicking this icon will make the video expand to the full screen.
-
Jump : Clicking this will jump to the screen which is configured in the video object properties.
Return to the Top: Video Object for Canvas